
Wondering how to assemble metal sectional picture frames? Our step-by-step guide is here to help. Read the instructions and follow the pictures to learn how.
Step 1
Each metal sectional frame is cut to the size you specify and comes with eight L-Brackets for assembly. Each L-bracket containing screws stacks on top of an L-bracket that is blank. Slide the set of two into the extrusion at the back of each frame section.

Step 2
Fit an adjoining frame section onto the other arm of the L-Bracket. If the fit seems tight, loosen the screws in the L-brackets and try again.

Step 3
Push the two frame sections firmly together, forming a corner. Do not tighten the screws just yet. Insert another set of L-brackets into the opposite corner so that you have 3 sides assembled.

Step 4
Now tighten the screws. Then slide the stack of contents into the open end and assemble the 4th side of the frame.

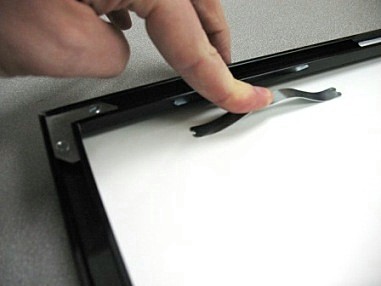
Step 5
The spring clips are designed to fill up the front to back play of the contents in the extrusion.
Step 6
Just press down on the spring clip and slip it under the extrusion.
Step 7
You will receive as many as 8 spring clips for firming up the contents in the frame.

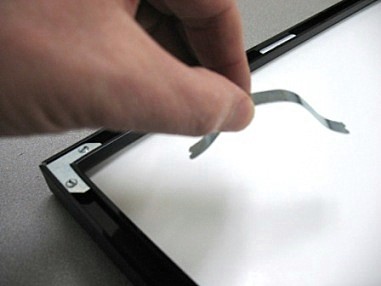
Step 8
Spring clips can be easily removed with a screwdriver.

Step 9
You will receive two hangers.

Step 10
The hangers slip into the extrusions on each side of the frame.

Step 11
Fit the hanger into the extrusion and press down until it snaps in.

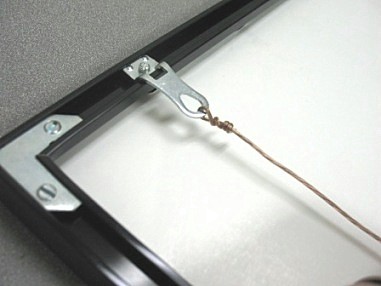
Step 12
Tie hanging wire to the hanger. Note: Hanging wire is sold separately. Find it here.

Step 13
Pull the wire over to the other hanger and tie it on. Your framed art is ready for hanging.